I will go through the first steps for managing Virtual Machines. We will create a Windows VM, start the Internet Information Service IIS, attach a new disk, resize the vm, create new network interface, and finally create a new image from our custom VM. Managing Azure Virtual Machines is part of the AZ-303 exam for becoming an Azure Solution Architect.
 Watch AZ-303: Azure Virtual Machines
Agenda
- Create a Windows Server 2016 Datacenter VM
- Installing Internet Information Service (IIS)
- Managing Disks
- Attach new Network Interface
- Changing the Size of a VM
- Custom Image
- Useful links
Create a Windows Server 2016 Datacenter VM
I will start by creating a Windows Server 2016 Datacenter VM …
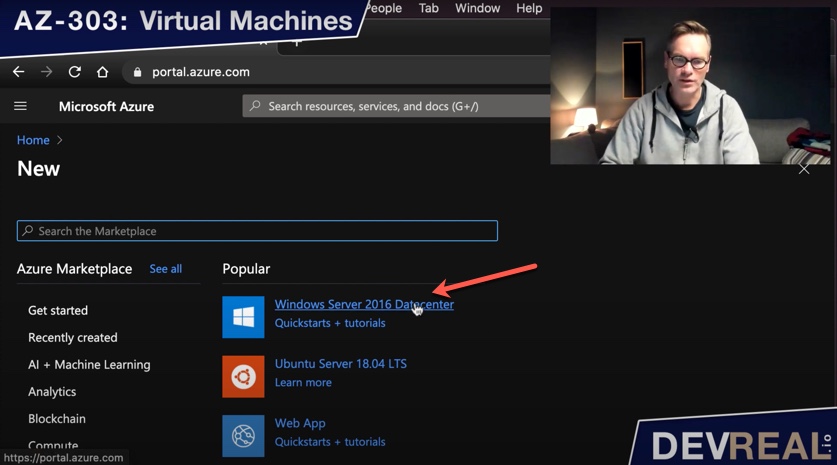 Creating Windows Server 2016 Datacenter VM
… and setting some basic parameters, Resource group, Name, Availability options, and Image. I will stick to the default values where I can.
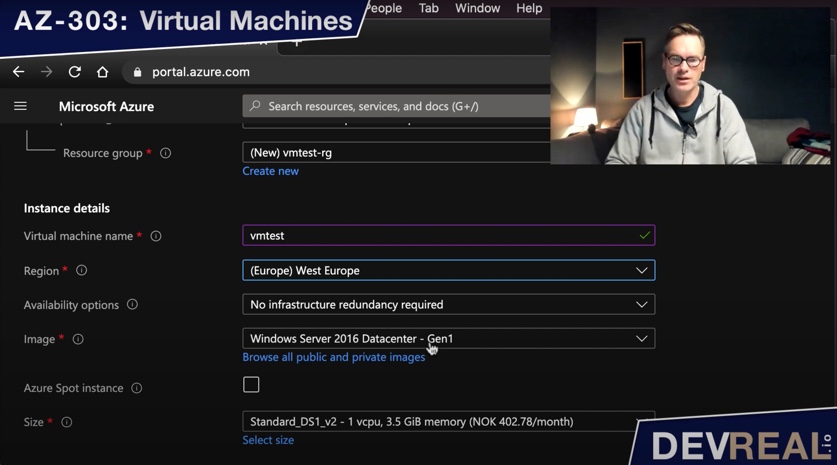 Configuring VM
The subnet get the default range of /24. I will also create a public IP address and keep the inbound RDP port 3389.
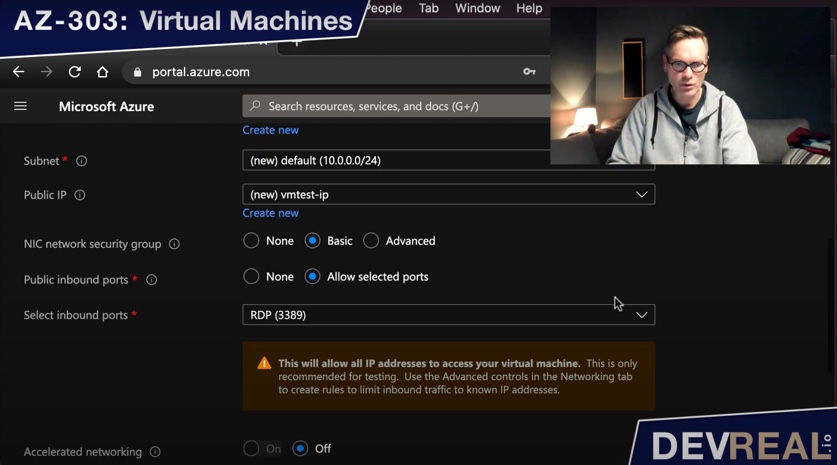 Configuring VM 2
If you want you can ignore all the remaining settings and stick to the defaults. Click Create and waaaiiit. This will take some minutes. Once created, we will connect to it with RDP, download the file and click on it. If you are on a Mac you will need to install the Microsoft Remote Desktop application first.
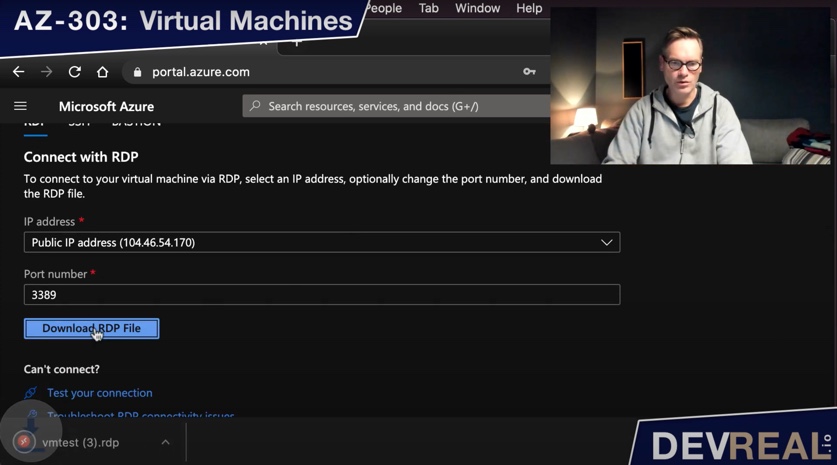 Connect to the Windows Server 2016 Datacenter VM
Installing Internet Information Service (IIS)
I will now install the Internet Information Service (IIS). You can do this with the Server Manager.
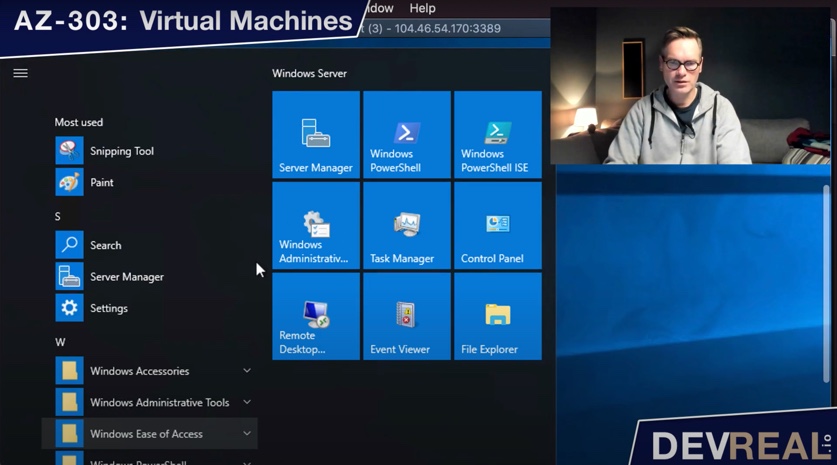 Start Server Manager
Click on Add roles and features so we can add the Web Server IIS.
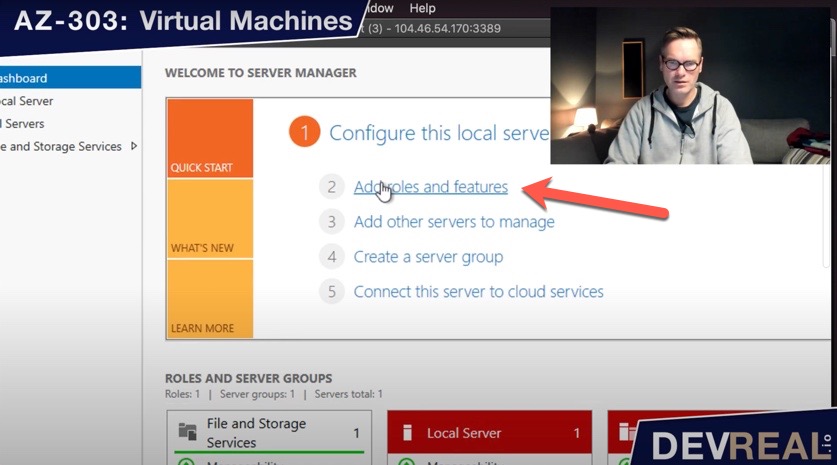 Add roles and features
Keep the selection Role- based or feature- based installation, and click Next.
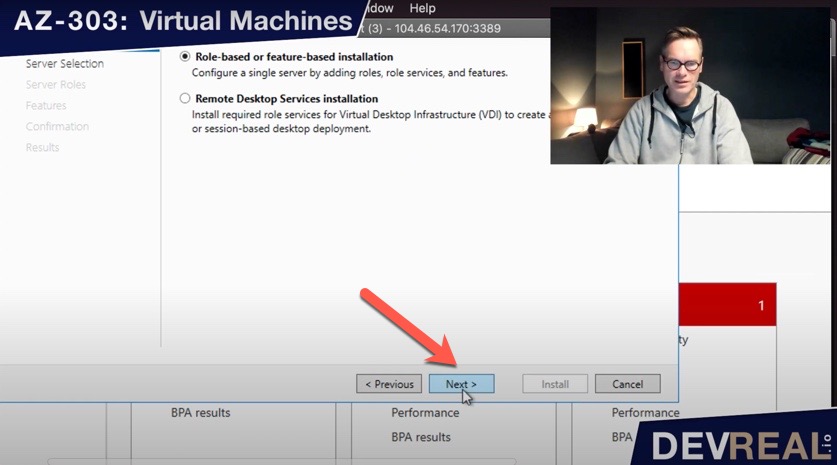 Installing Internet Information Service IIS
Scroll down in the feature list and select Web Server (IIS), and click Next.
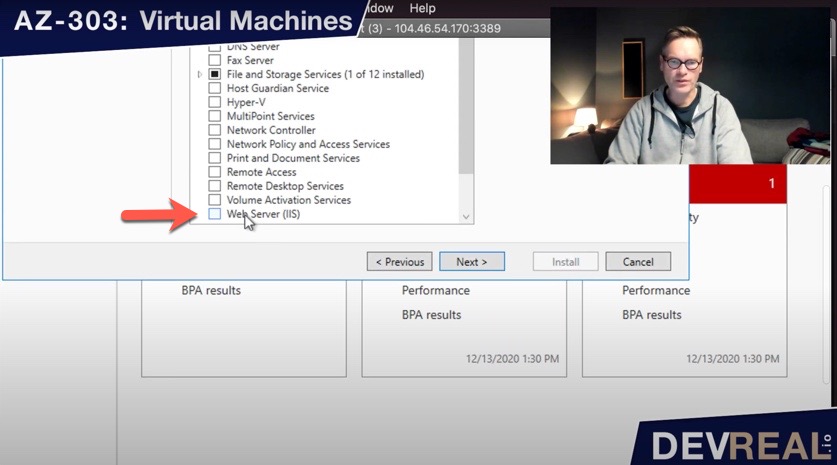 Select Web Server (IIS)
Confirm your selection by clicking Add Features, …
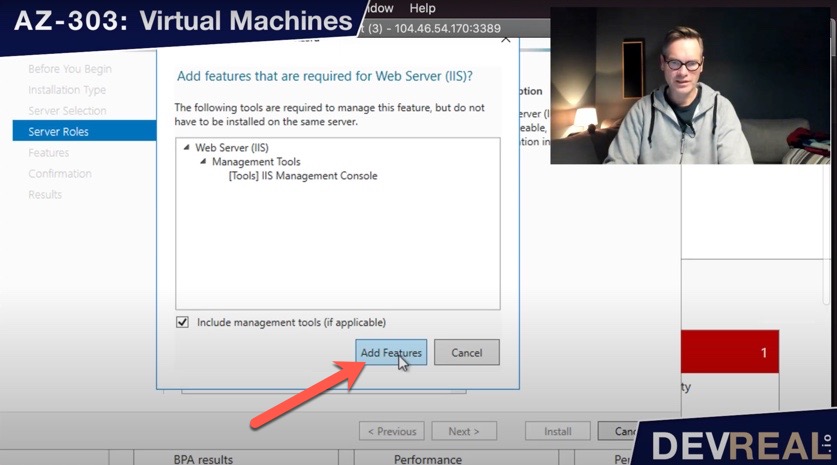 Add Features
… click Next …
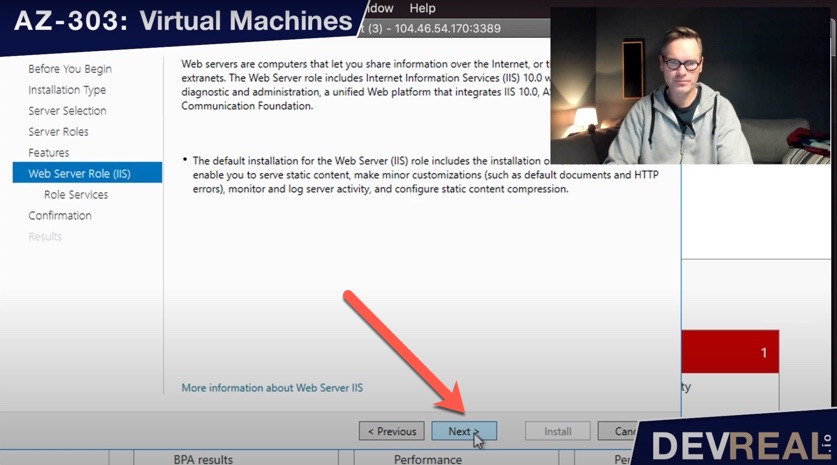 Continue Add Features
… and finally Install.
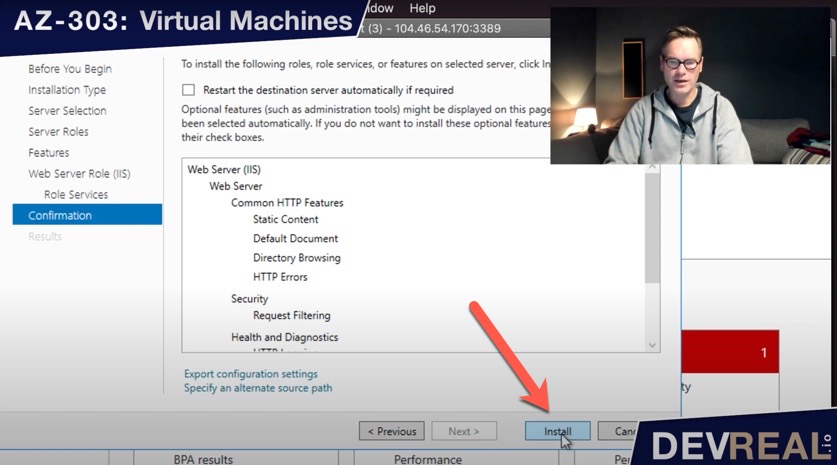 Install features
The installation will take a minute. Close the window now.
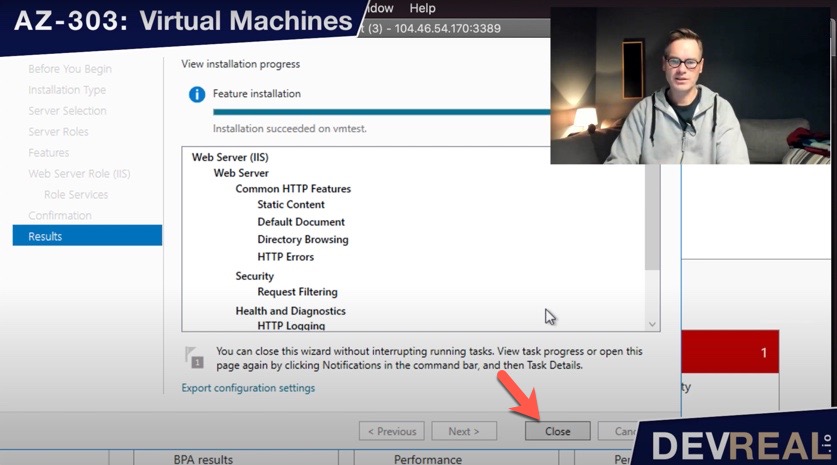 Close installation of IIS
You find the public IP address in the overview of the virtual machine. Use this IP address and try it out with your browser. You shouldn’t be able to access the IIS on port 80 yet, because we didn’t tell Azure yet to allow traffic through this port.
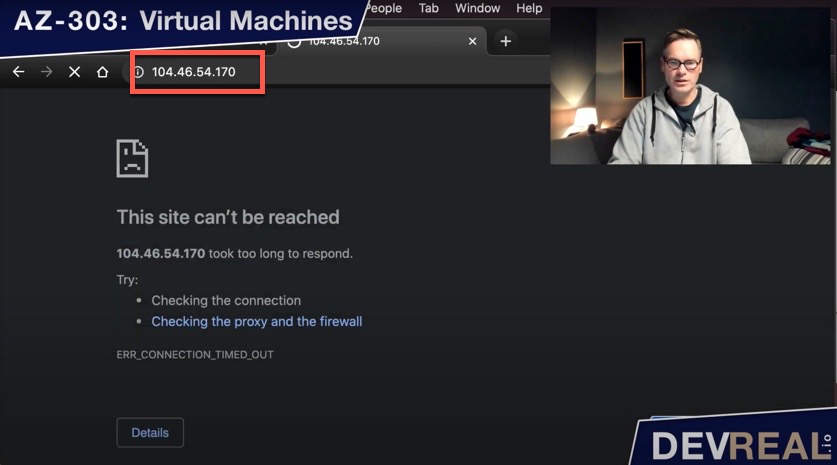 Failed IIS test
We will now open port 80 by navigating to Networking in the virtual machine. We can see here that we allow traffic on port 3389, so we can login, but we can’t see port 80. Click on Add inbound port rule.
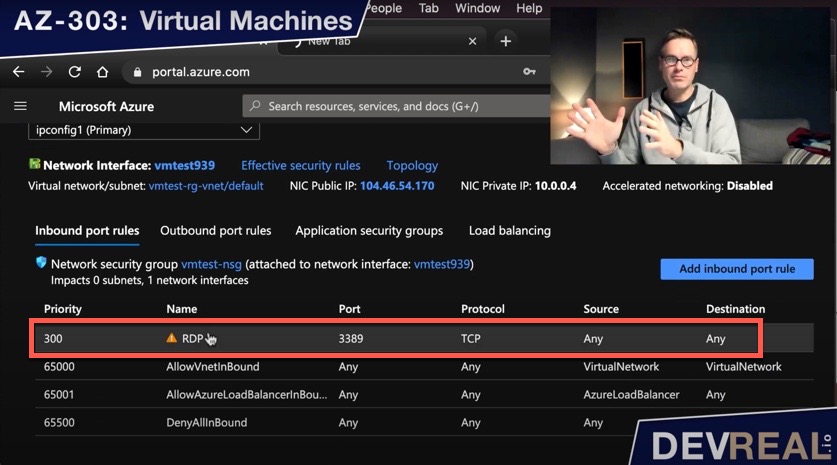 Inbound port rules of VM
Set as Source Service Tag and as Source service tag Internet. This means that the traffic can come from outside the VNet. The destination port that we allow for this virtual machine is port 80.
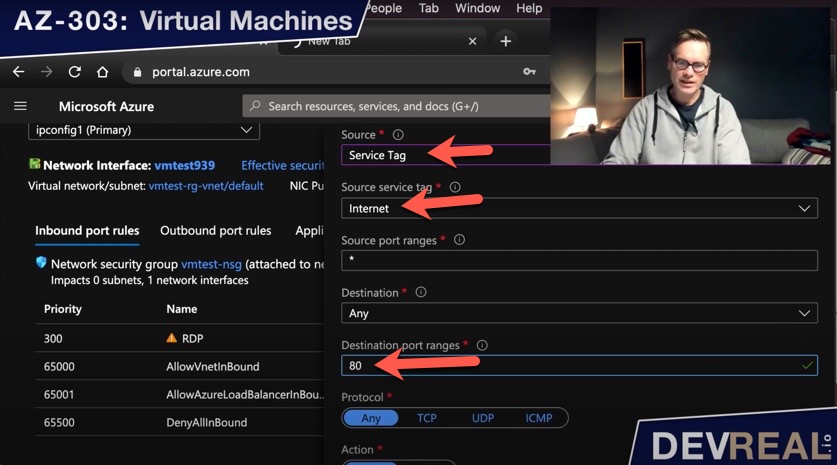 Configure inbound port rule
Now, let’s test the public IP address from our browser again, and you should be allowed to access the IIS on port 80.
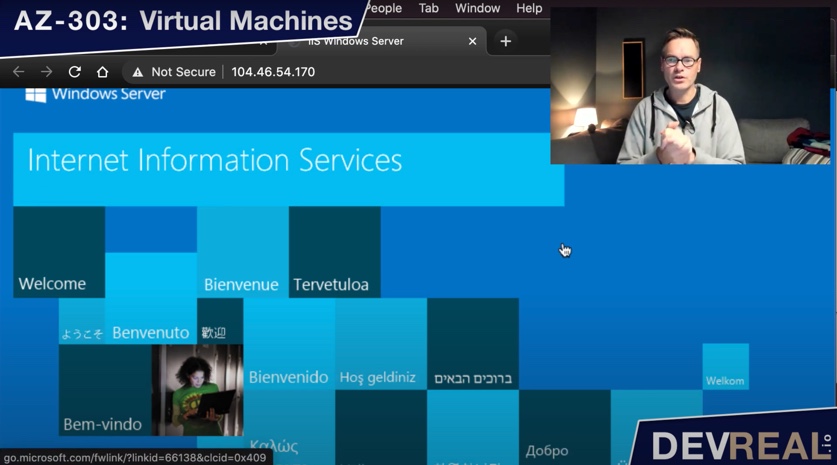 Accessing IIS
Managing Disks
When we create a virtual machine, we get two disks, one for the Operating System (C:), and one temporary disk (D:). The temporary disk is really what its name suggests. Once we stop the VM, the disks get deallocated. When we start the VM again, we get a fresh (D:)-disk and whatever we have stored there is gone.
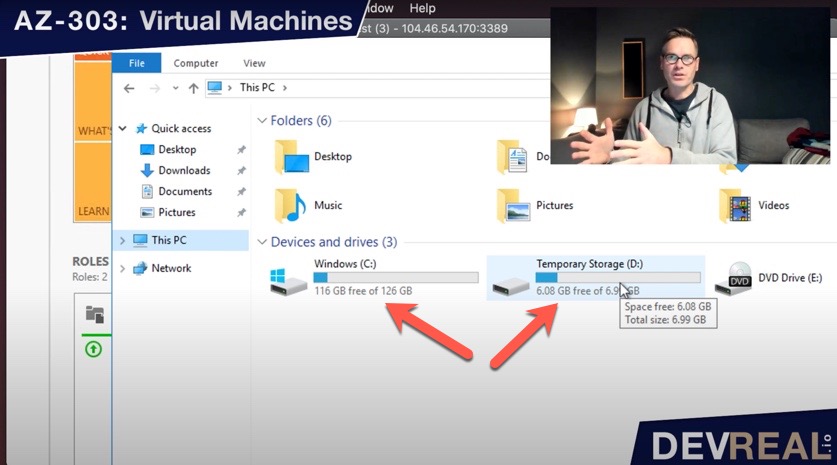 VM with OS- and temp- disk
Let’s add another disk and attach it to our virtual machine by navigating to Disks for the VM, and click on Create and attach a new disk. Choose a name, Storage type, and Size.
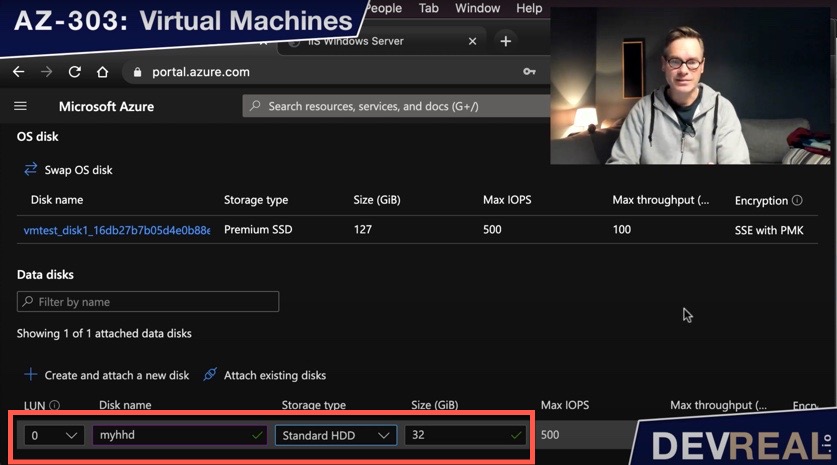 Create and attach a new disk
Now, switch back to the VM and inform the OS about the new disk as well. Click on File and Storage Services in Server Manager, …
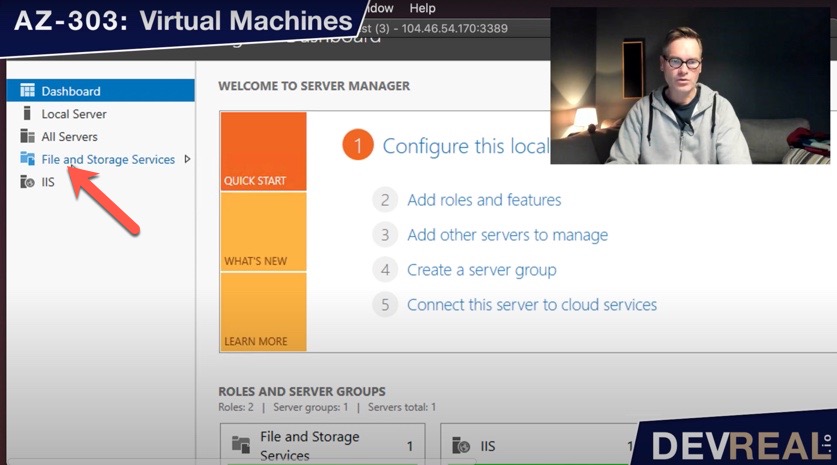 File and Storage Services
… select Disks, …
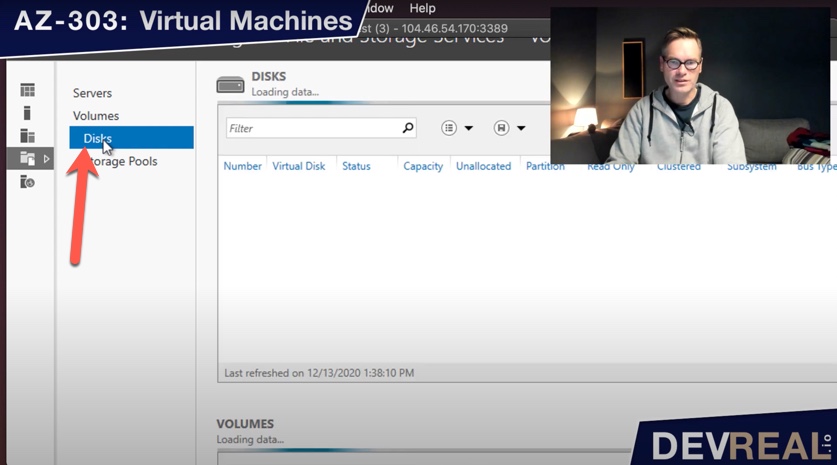 Adding disk 1
… right-click on the new disk and select Initialize.
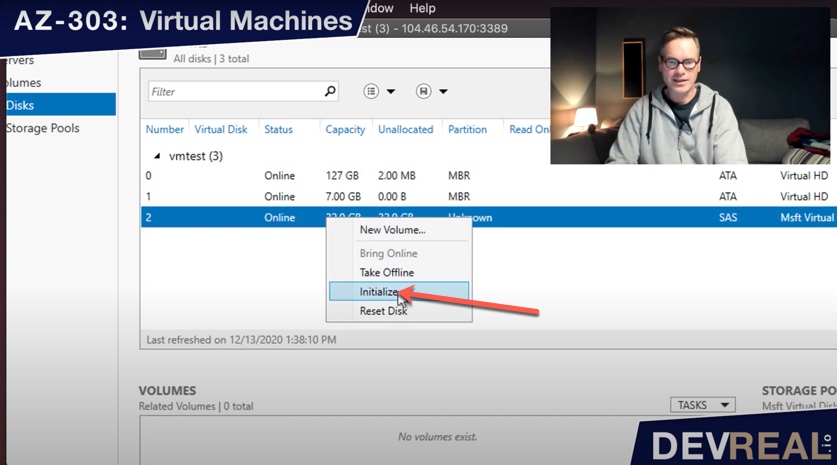 Initialize new disk
Right-click once again and chose New Volume….
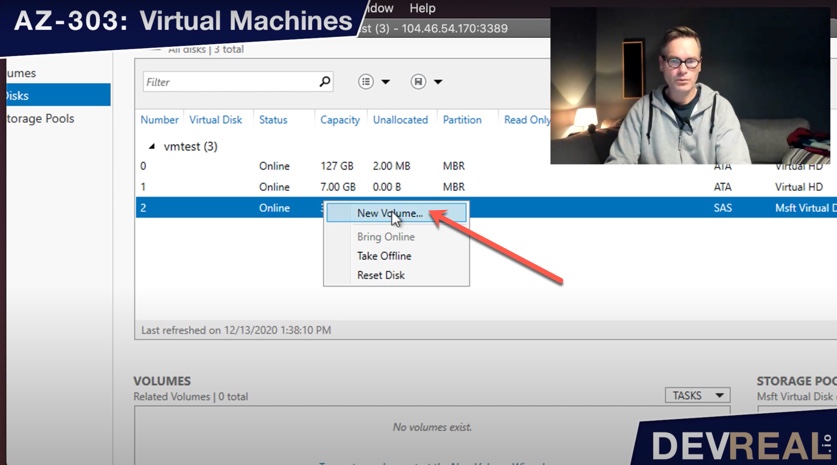 Create new volume
Almost done. Click Next, …
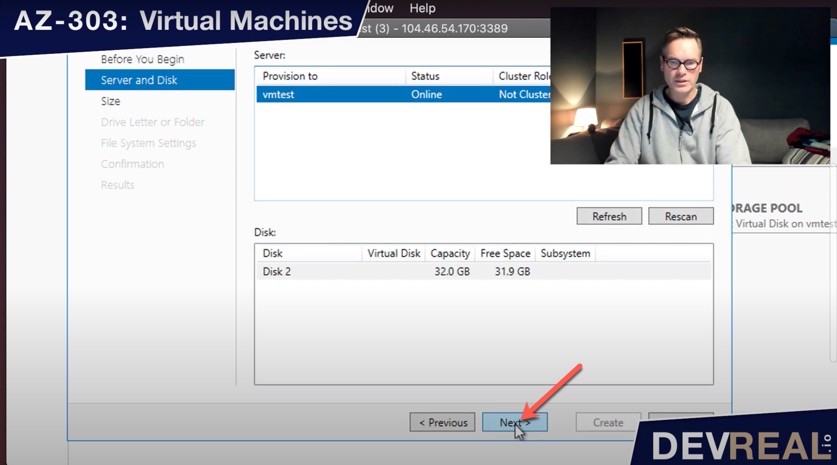 Add new disk …
… and choose a drive letter that you want to use. I stick to F.
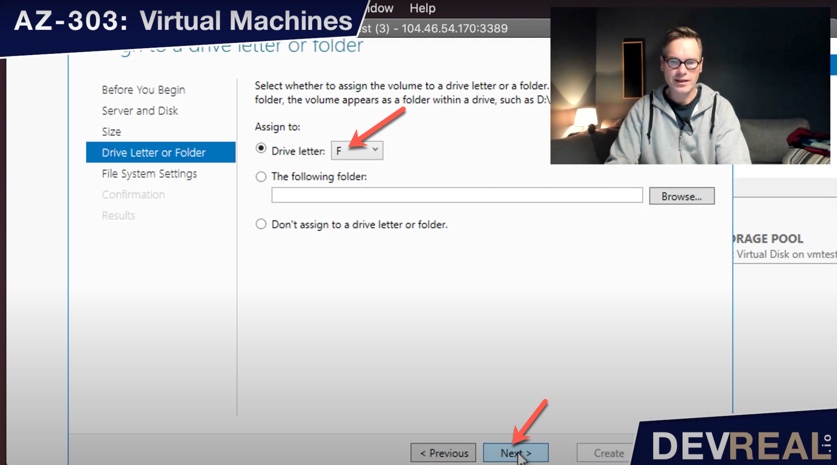 Choose drive letter for new volume
Name your new volume. I forgot this and kept New Volume.
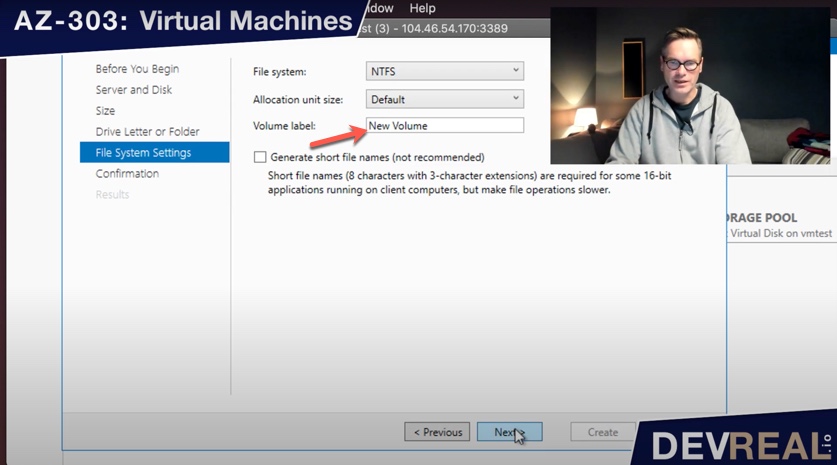 Name new volume
The new volume will be set up now. This process takes about a minute or two. Finally click Close.
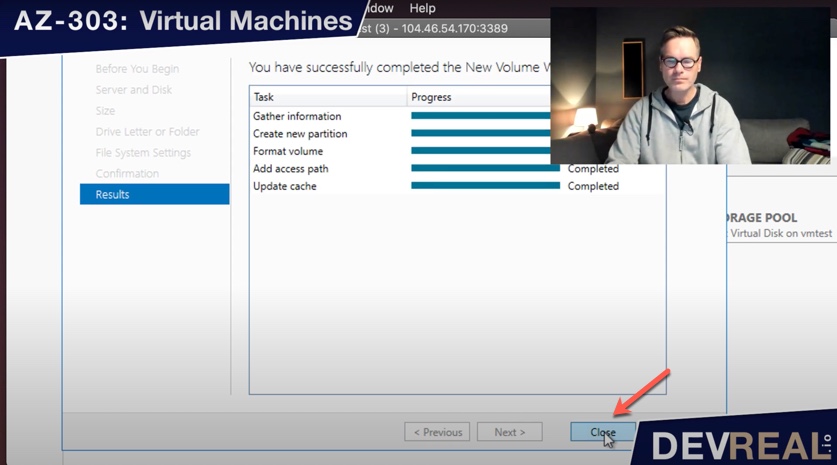 Processing creation of new volume
Check now in the Explorer if the new drive letter F was added.
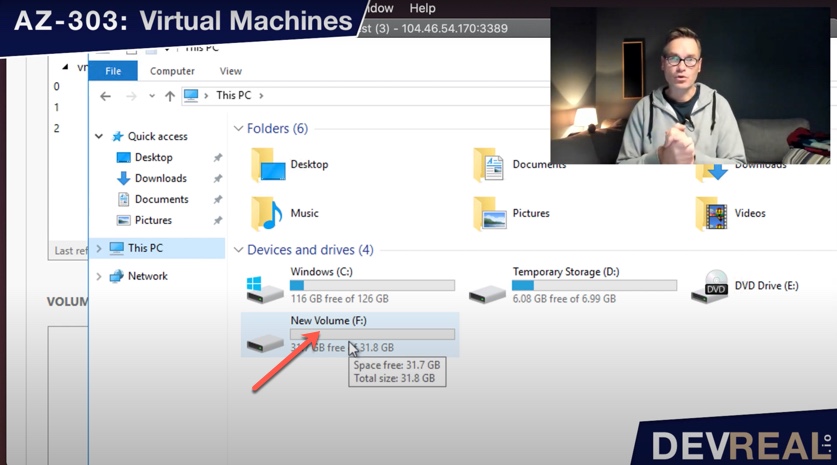 Added new drive
Attach new Network Interface
When creating virtual machine, you get one network interface. In some use cases, you will want another network interface for different clients with different network security rules. I will demonstrate now how to add a new network interface.
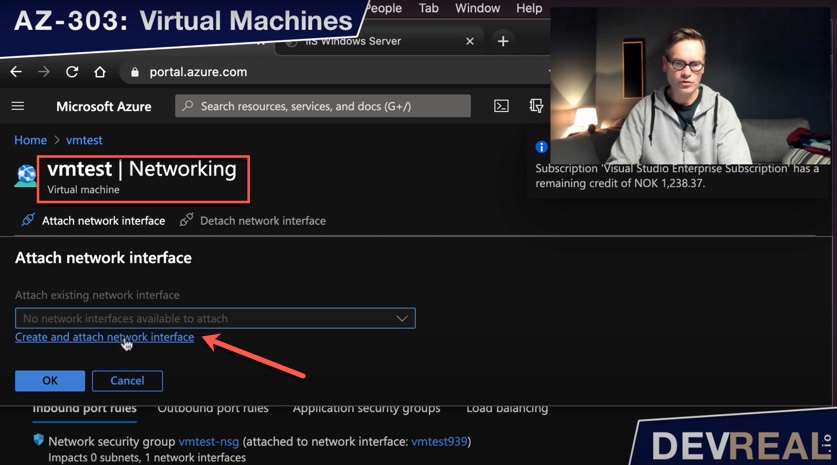 Create and attach network interface
Choose a name and. The subnet will already be set to the one where your VM is running in. We let the network security section as is.
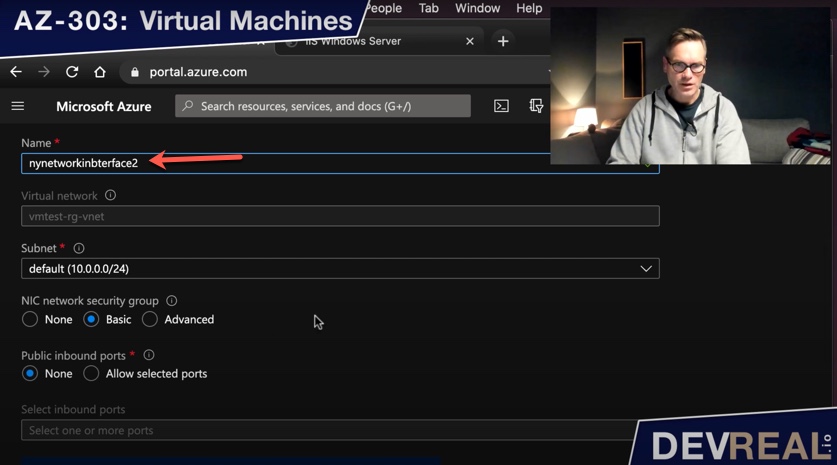 Configure new network interface
Vóila, the new network interface was created and attached to your VM.
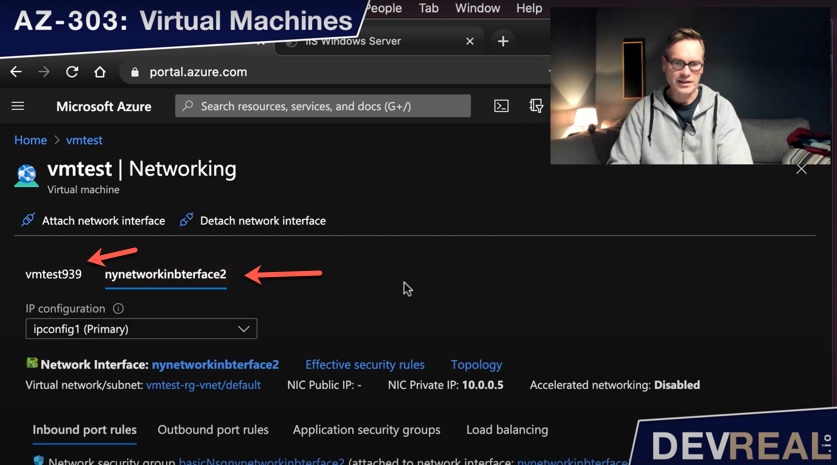 VM with two network interfaces
Changing the Size of a VM
In the menu of your virtual machine, select Size. Make sure you have stopped the VM first. Otherwise you won’t be able to re-size the VM.
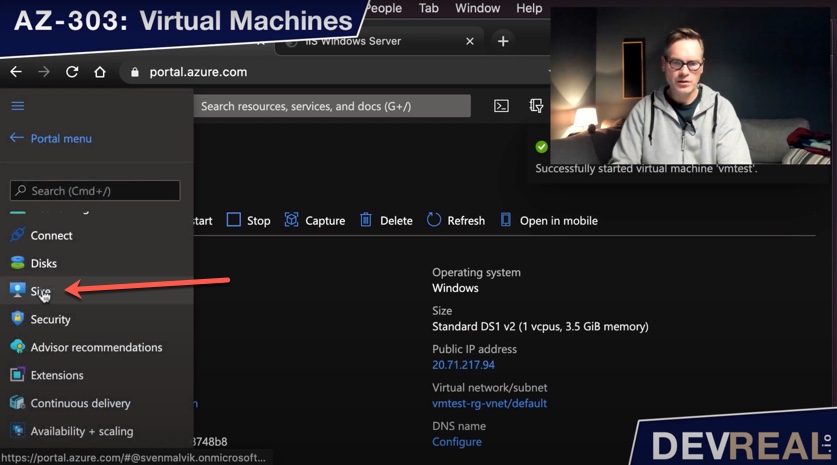 Change VM size
When you stopped the VM, you will get some more sizes to choose from. Select a size …
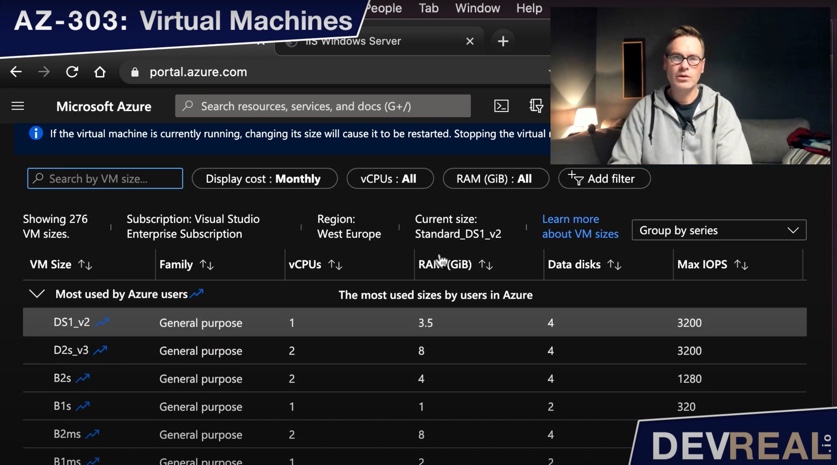 Select a VM size
… and click on Resize.
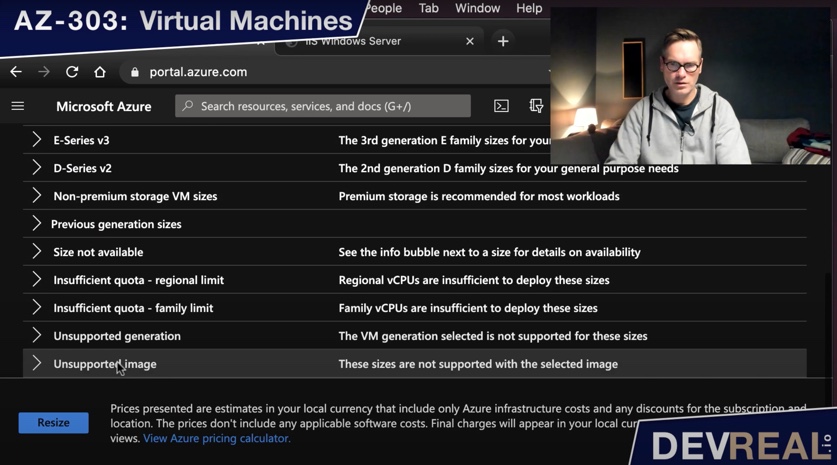 Resize VM
You have now changed the size of your VM, and you can start it again. Notice: Whenever you restart the VM, the temporary disk will be re-allocated.
Custom Image
Let’s just say that our virtual machine is set up, and we now want to spin up some more of it. Remember that we installed teh Internet Information Service (IIS) on it.
We open the tool System Preparation Tool that is located under C:\Windows\System32. We select Generalize which will ensure that users and other custom configurations will be ignored. We will also select Shutdown.
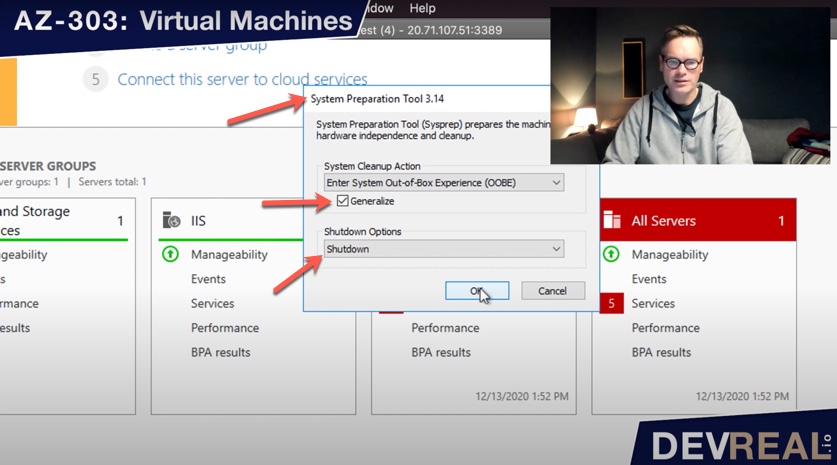 System Preparation Tool
In the portal, we also click on Stop to de-allocate the disks. In case you haven’t set a static IP address, but kept the dynamic IP address (default), you will also get a new IP address. If you want to keep the IP address that you have now, you can switch from dynamic to static by clicking the checkbox. Remember that you will be charged for a public IP address in use.
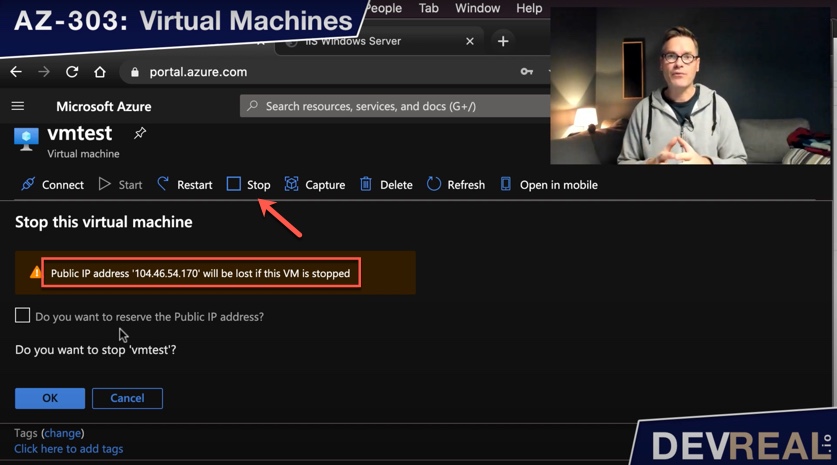 Stop VM
Now we click on Capture.
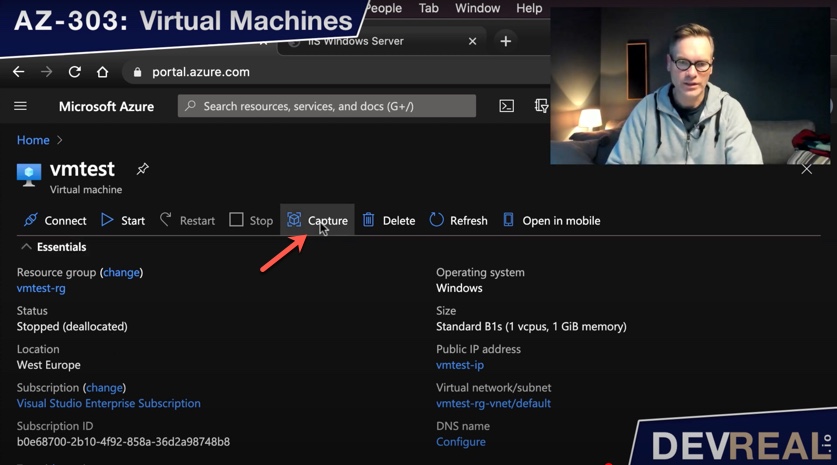 Capture VM
For the purpose of this demo, and for the AZ-303 exam, select No, capture only a managed image. Finally, set a name for your custom image and click on Create.
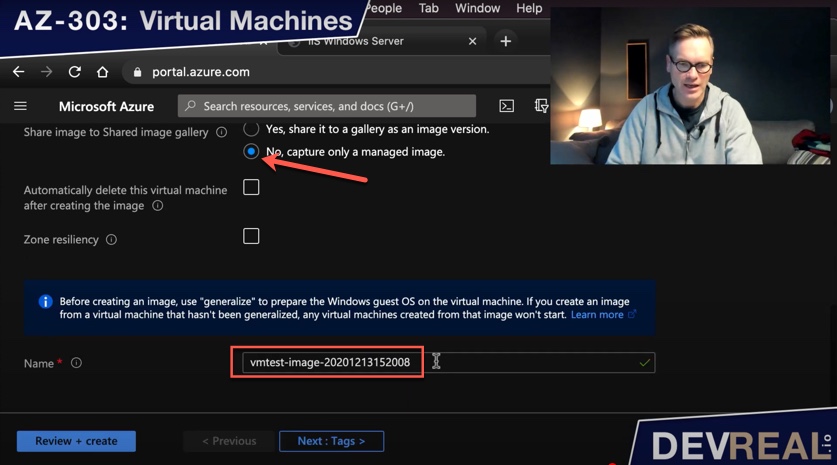 Capture only a managed image
We can now create a VM from our custom image. What we will get is a Windows Server 2016 Datacenter with the IIS already running.
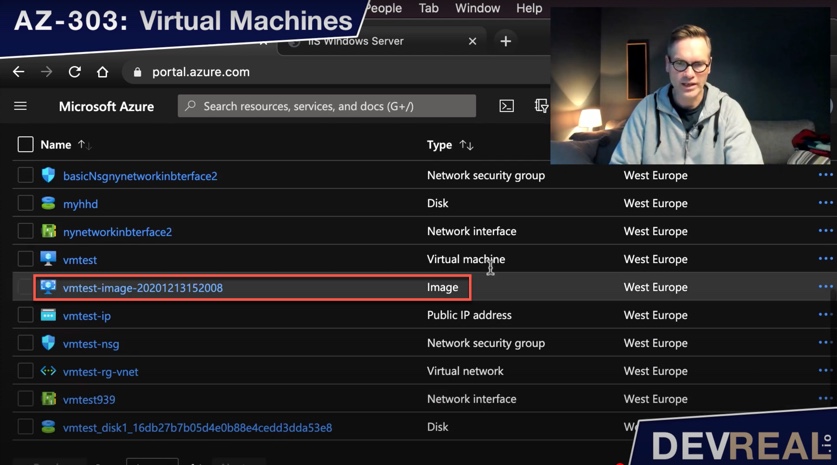 Custom image
Click on Create …
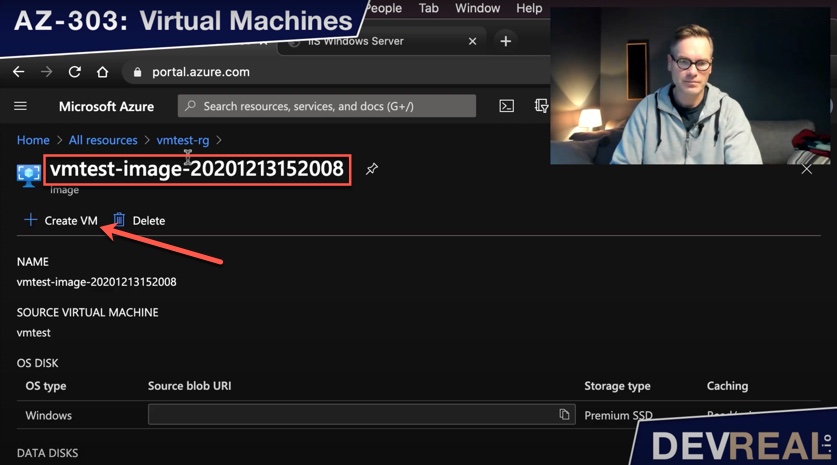 Create VM from custom image
… and fill out the other parameters as briefly described in the top of this AZ-303 preparation.
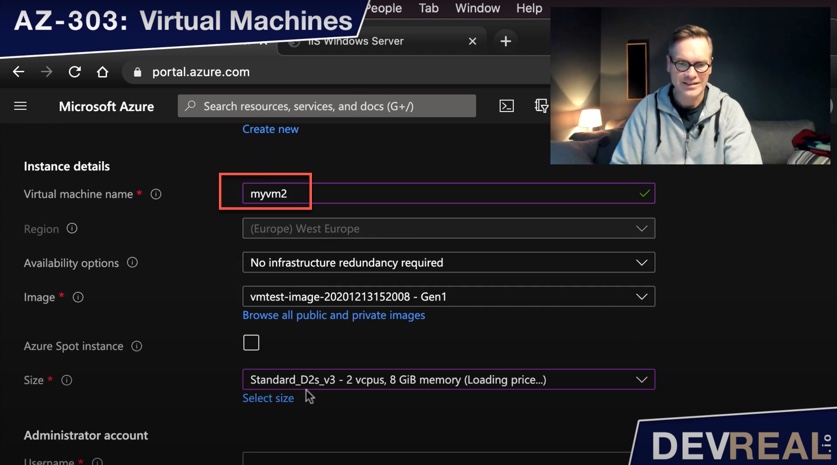 Configure VM
Once the new VM was created, we can access it from anywhere with the public IP address that you can find in the overview for this VM. As you can see, without installing the IIS first, we can access it directly.
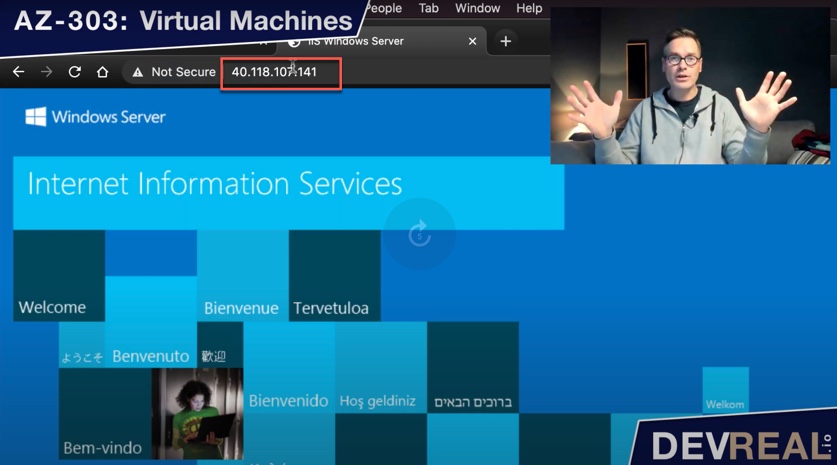 Testing IIS on custom VM
 Sven Malvik